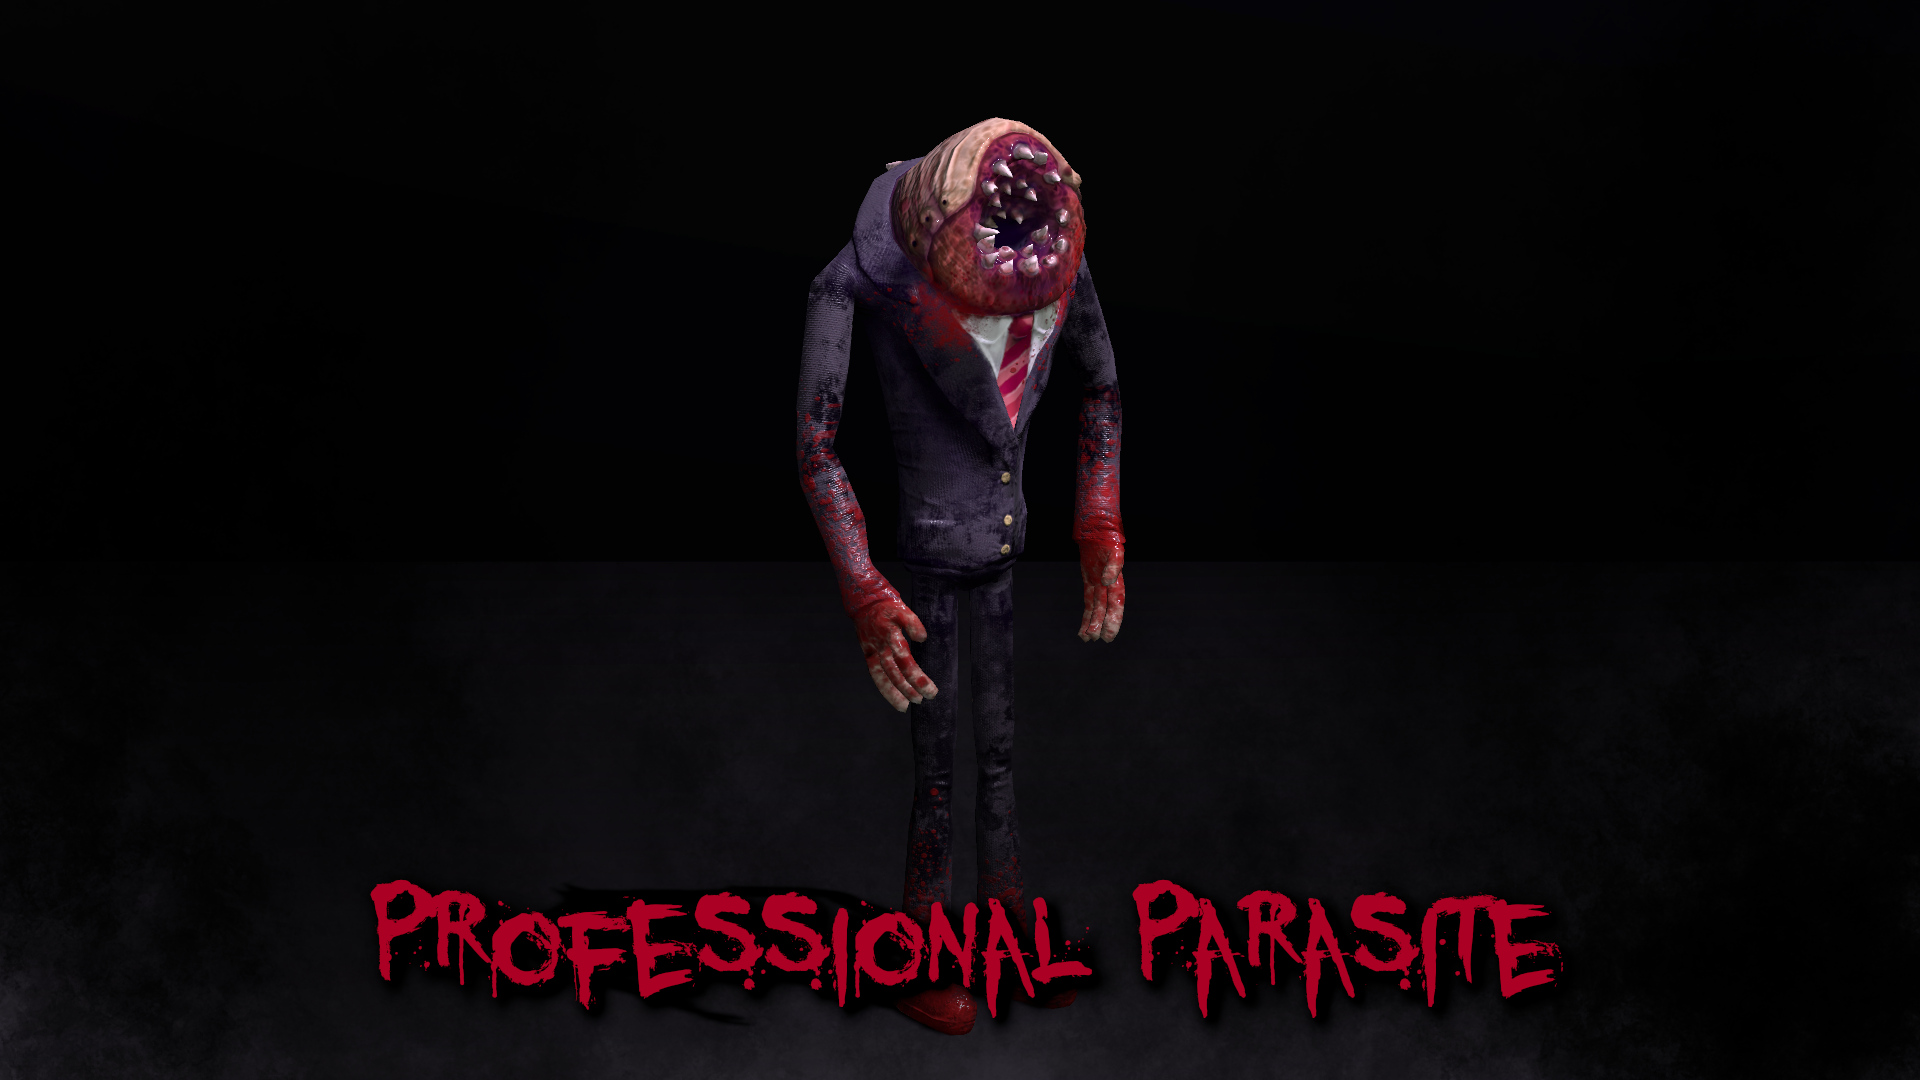
Welcome to the docs for my Professional Parasite 3d model / Avatar. This is a humanoid model created for use in conjunction with unity-based humanoid animations that you can get from various sources. It also has an included avatar optimized for VRChat.
The professional parasite is a humorous depiction of corruption in high places. You decide where he fits best.
Professional Parasite Model Details:
Texture Maps are 4096 x 4096 pixels:
- Color: Leech-Texturing_Leech_Man_AlbedoTransparency.png
- Metallic: Leech-Texturing_Leech_Man_MetallicSmoothness.png
- Normal: Leech-Texturing_Leech_Man_Normal.png
Geometry LODs:
- Main object faces: 2613
- LOD 1 faces: 1783
- LOD 2 faces: 1047
Unity Avatar is fully configured. This model’s hands have 4 fingers (1 thumb, 3 front fingers) so the pinky has been excluded.

Avatar is Fully Set
Two of my favorite sources for free humanoid animations:
This character was created and optimized for general use. Please note that *I have not included custom animations* with this model (except a Zombie Idle example from Mixamo, included in demos scene), because you can easily obtain hundreds for free from the sources above, provided you are literate in basic functions Unity and can implement them into the model.
Using Animations from Mixamo
In this asset, you will find a special file:
Animation_Template
It is located in:
LB3D/Professional_Parasite/Animation_Template/
This is a minimal file that is specifically made to be accepted by Mixamo’s system (Mixamo is tricky with pre-rigged models, so this is provided to make the process easy).
If this process is new to you, follow this step-by-step process shown below. Please note that the Mixamo site may change slightly over time, but the process should be the same. Course correct as needed. This assumes you are integrating animations into your own Animator Controller setup. The demo scene integrates a super simple animation controller demo along with the turntable.
1: Go to Mixamo.com

Go to Mixamo.com
2: Upload the Animation_Template.fbx file for animation selection.

Select File
3: Verify and Review

Check for correct rigging
4: Choose Animation

Choose Your Animation
5: Then, Download

Push DOWNLOAD
6: Adjust FBX and Animation Settings

Adjust animation settings.
7: Set Up Animation in Unity

Unity Integration
Place the downloaded animation into the Unity project.
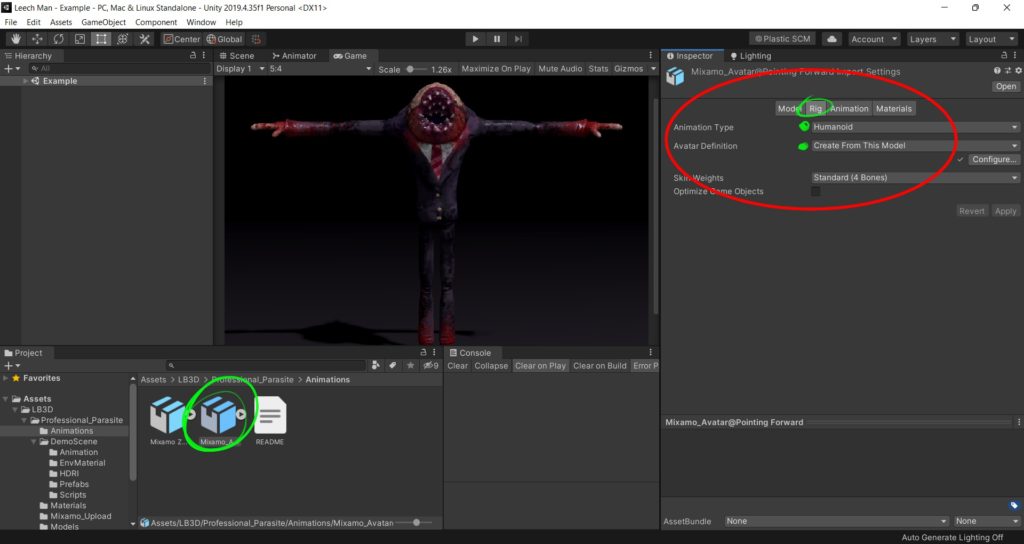
- Select the “Rig” tab.
- Choose Animation Type: Humanoid.
- Choose Avatar Definition: Create from this model.
NOTE: If you do not do this, the model will not animate. The downloaded Animation FBX must be established as a humanoid avatar just as the asset model is. (You do not have to change the original asset model. Just make sure the new animation is a humanoid avatar.)
7: Integrate Into Animation Controller

Animation Works!
Using in the Professional Parasite VRChat
I love VR Chat because you can include your own avatars. In the very likely event that you’d like to portray yourself a giant leech wearing a suit, then here is a quick guide on how to get there quickly.
After downloading the asset, have your Unity VR Chat dev environment set up. No doubt you are familiar with this process if you’ve ever created your own avatar. Here are the reference guides:
- Set up the SDK: https://docs.vrchat.com/docs/setting-up-the-sdk
- Set up the avatar: https://docs.vrchat.com/docs/creating-your-first-avatar
When you are ready to integrate the Professional Parasite model, use the prefab found in:
LB3D/Professional_Parasite/Prefabs/VRChat
This prefab has no LODs and the capsule collider removed, just like VR Chat prefers. When you are in the process of building and publishing, it may flag some “problems” that are easily resolved by running automated fixes. Feel free to do whatever VR Chat SDK says. Its non-destructive.
There is also a Jaw bone which you can map for voice sync. You must map it to the jaw flap function the VRChat descriptor provides.
