Documentation Contents:
Retrobot! A Brief Part of Internet History
Fun fact: this character goes back in time a bit. There are some things on the internet that are hard to forget. This robot was hard to forget one time too. He was a stock image mascot and has found his way around all over the internet. You could do a reverse search on TinEye.com using these images to see just what I’m talkin’ ’bout.
Retrobot Business Mascot, Custom 3D Character Design
Main Prefabs
The robot prefabs can be found in the folder LB3D/Retrobot/Prefabs/Variants.
Animations
Included with the robot is a decent animation controller that should get you started. I’m aware that all games/apps are different, and usually the game designer will prefer to design their own character controller. You can safely remove this if you wish to create your own.
Please note: Many animations are included. However, this is a very simple character and can be animated in Unity. Teaching animation within the Unity editor is out of the scope of this documentation. Be sure to look into it using online tutorials if you are not already familiar with the subject.
Since this character floats and hovers, it was not necessary to provide root motion in the animations, as there is no foot-traction or other location-sensitive animations to keep track of.
Therefore, it is necessary to control the forward, backward, and lateral animations of the robot as he flies around.
To use the included animation controller, have a look at RetrobotController.cs
// RetrobotController.cs (excerpt)
using System.Collections;
using System.Collections.Generic;
using UnityEngine;

public class RetrobotController : MonoBehaviour
{
    // ...
}
One-Shot Animations
To play a one-shot animation:
DoAction("Do_Giggle");
Or, from your own script:
GetComponent<RetrobotController>().DoAction("Do_Giggle");
Here are some other actions included (see the Animator Controller and the animations folder for the complete list):
// Included animations you can fire off with the DoAction method.
DoAction("Do_Giggle");               // cute giggle
DoAction("Do_Angry_Dramatic");       // becomes an angry drama queen
DoAction("Do_Dissapointed_Slow_Shake"); // when you see silly questions posted in Unity forums ;)
DoAction("Do_Shock_And_Awe");        // your reaction when you first saw this asset on the Unity Store
Idle and Motion Animations
The character controller does not use root motion. As your own script controls locomotion and rotation, use these helpers to lean/animate accordingly:
// Turning left or right:
SetMotionXState(0);   // idle, no leaning
SetMotionXState(1);   // leans to the right
SetMotionXState(-1);  // leans to the left
// Moving backward or forward:
SetMotionYState(0);    // idle
SetMotionYState(1);    // leans forward
SetMotionYState(-1);   // leans backward

// Subtle movement:
SetMotionYState(0.5);  // slight forward
SetMotionYState(-0.5); // slight backward
Be sure to check out the demo scene for how these are implemented. Of special interest:
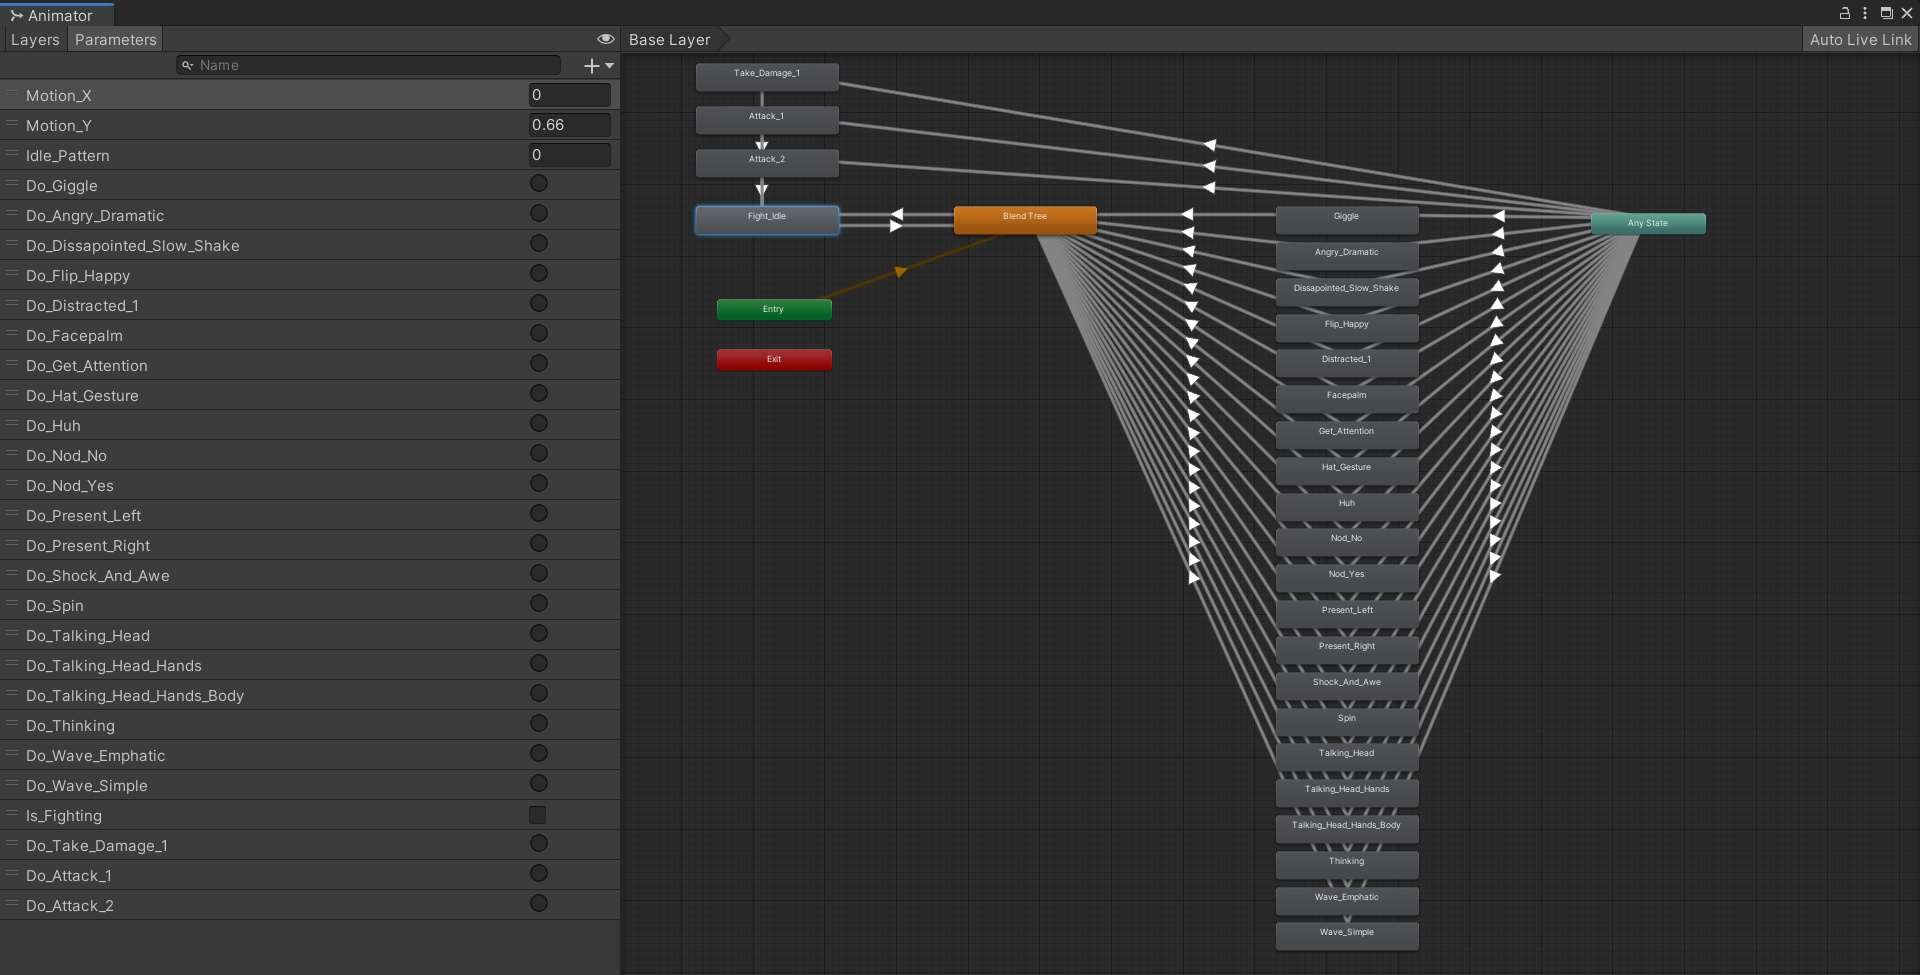 Retrobot Animation Controller
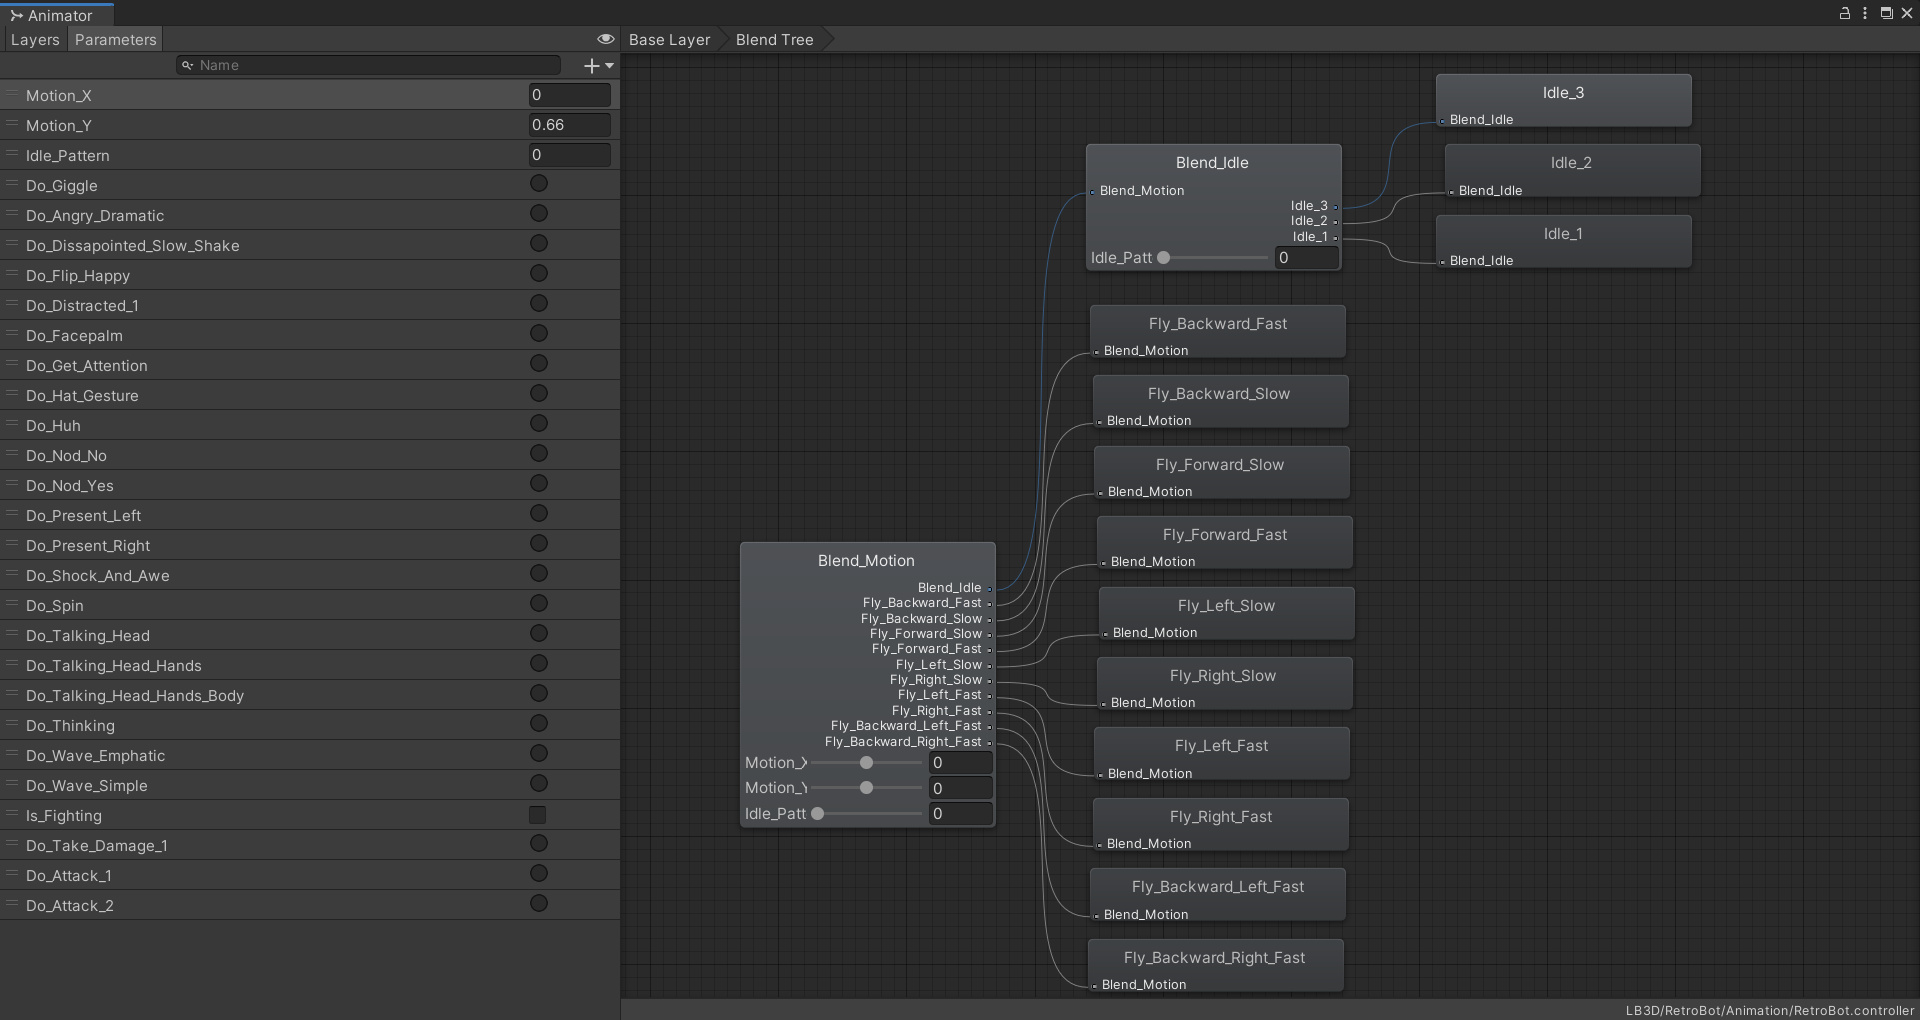 Animation Controller Blends, Idle and Motion States
Other Idle States
There is a “Fight Idle” and other idle states. Fight Idle is the default ready-to-fight pose. The other idle blend is for slightly different idle animations that differ in rate or air-float-depth.
// Toggle fight idle pose:
SetFightIdle(true);   // assumes fight pose in idle
SetFightIdle(false);  // normal idle
Blend between idle variants from 0 to 1:
SetIdleState(0.0f);  // basic idle, slower and less dramatic
SetIdleState(0.5f);  // more extreme idle, more float
SetIdleState(1.0f);  // high-energy idle
See the demo scene and the built demo to get more acquainted:
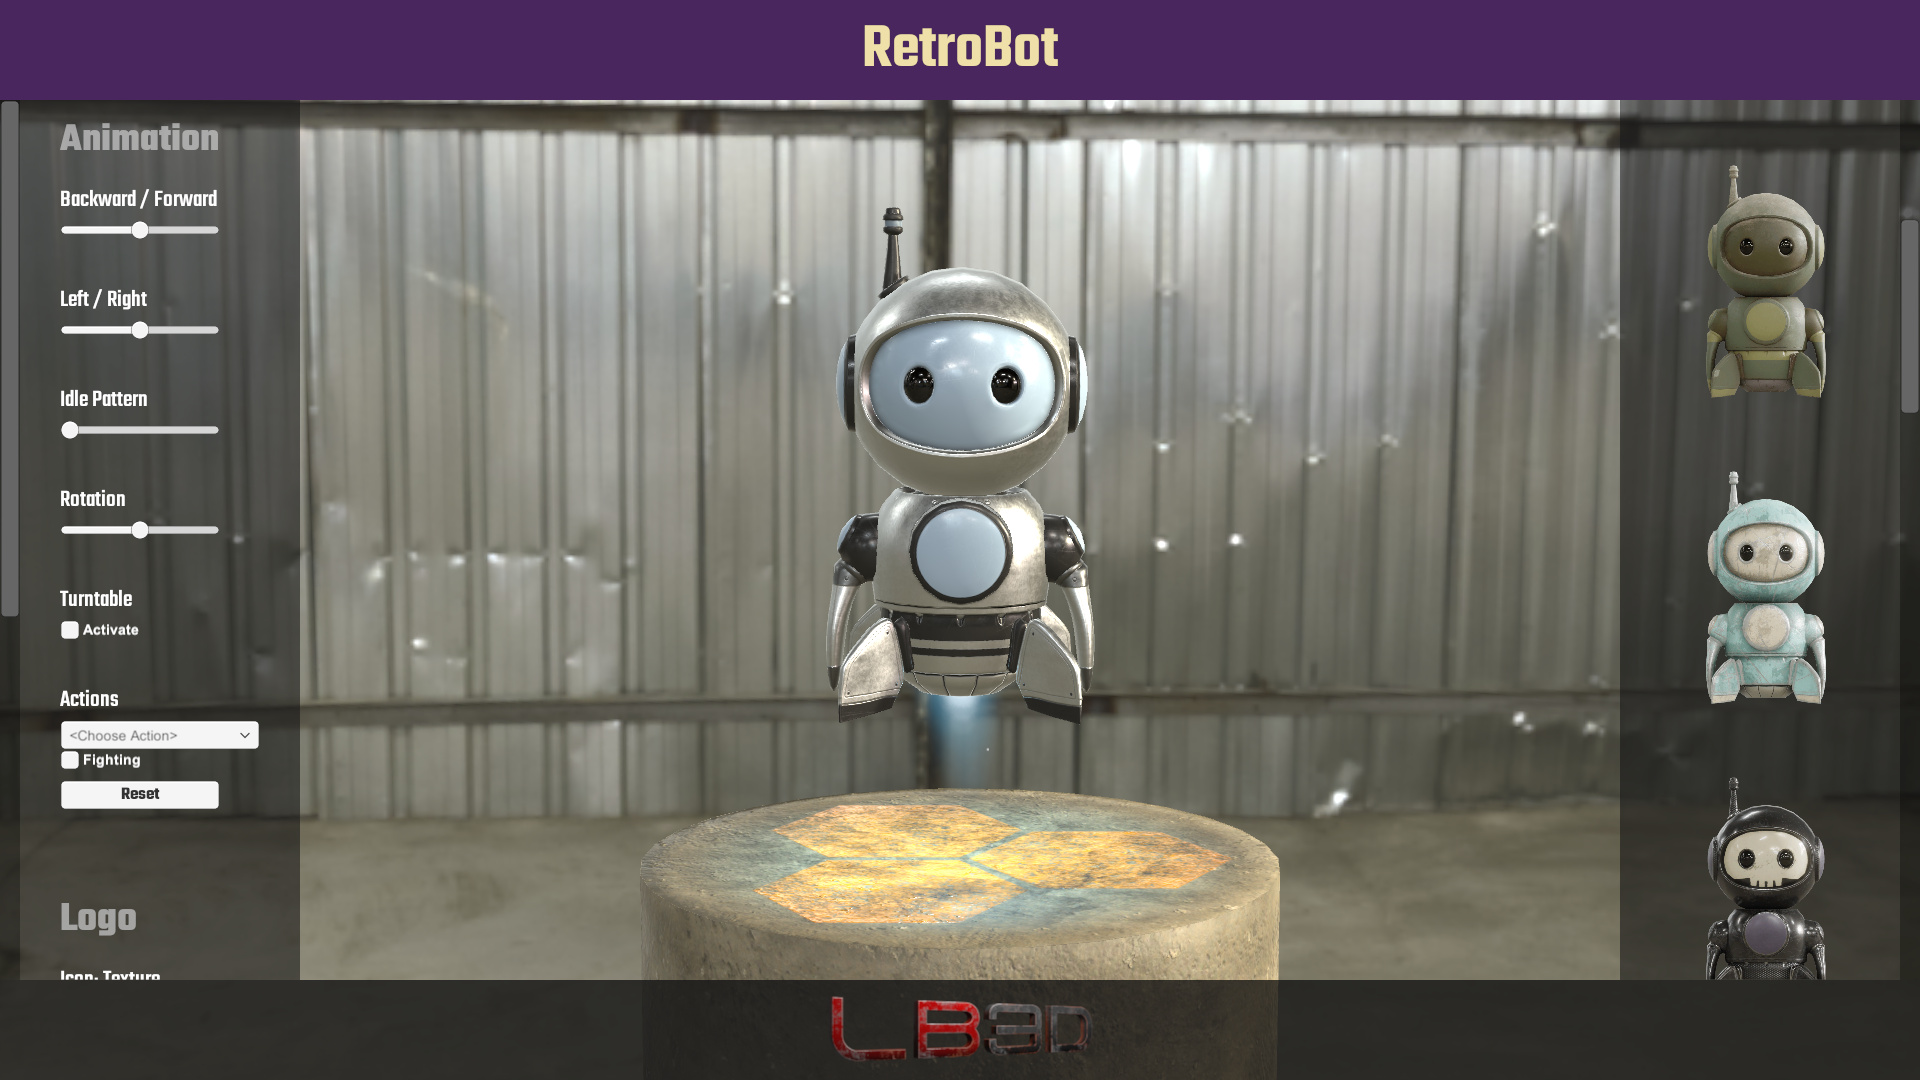 Retrobot Demo Scene
RetroBot Icon Display
The included icons are from game-icons.net licensed under CC 3.0.
The RetroBot mascot can display signs, icons, logos, or other images. Some icons are included as examples, but the system is made for custom use in your app/game since the robot can serve as a companion, guide, or presenter. For free icons, see https://game-icons.net/.
You may implement icons however you wish. A simple program is provided on the character for changing icons and colors.
Assigning Icons, Textures, and Colors
On the RetroBot prefab, you’ll find useful scripts attached (remove/alter anything you wish for your own game/app).
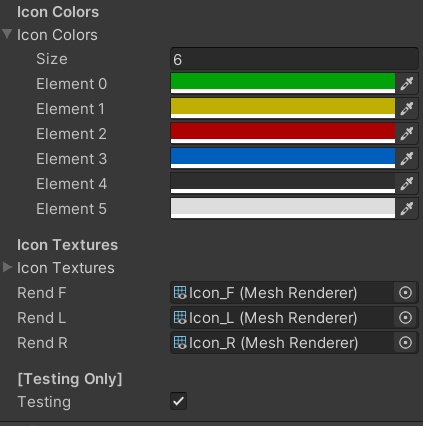
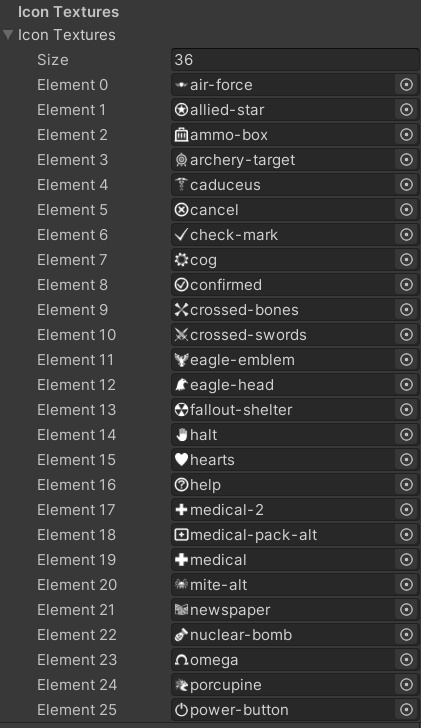
To assign unique icons (textures) and colors, use the RobotIconManager script:
![]() RobotIconManager in the Unity Inspector
Both the icons and color options have foldouts for assigning elements. Take note of index values for each color/texture.
RobotIconManager in the Unity Inspector
Both the icons and color options have foldouts for assigning elements. Take note of index values for each color/texture.
Color foldout:
Texture foldout:
To change colors and icons via script, first access RetrobotIconManager with GetComponent().
// Turn off the front icon:
retroBot.GetComponent<RetrobotIconManager>().ActivateFrontIcon(false);

// Turn off the head icons:
retroBot.GetComponent<RetrobotIconManager>().ActivateHeadIcons(false);
Change an icon (by texture index):
retroBot.GetComponent<RetrobotIconManager>().SetIconTexture(5);
Change an icon color (by color index):
retroBot.GetComponent<RetrobotIconManager>().SetIconColor(4);
This simple script will throw an error if you access an index that does not exist. Your game code should provide correct logic.
To disable icons entirely, toggle them off in the editor:
![]()
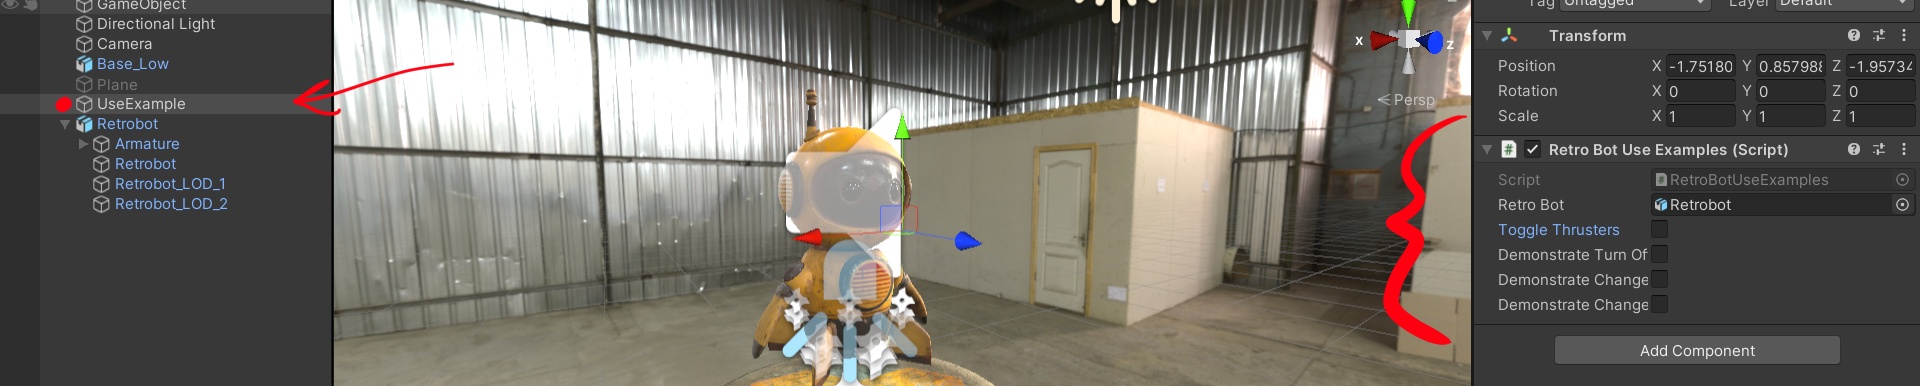
You can find example scripts in the scene. Look for the UseExample object and open the script to see application.
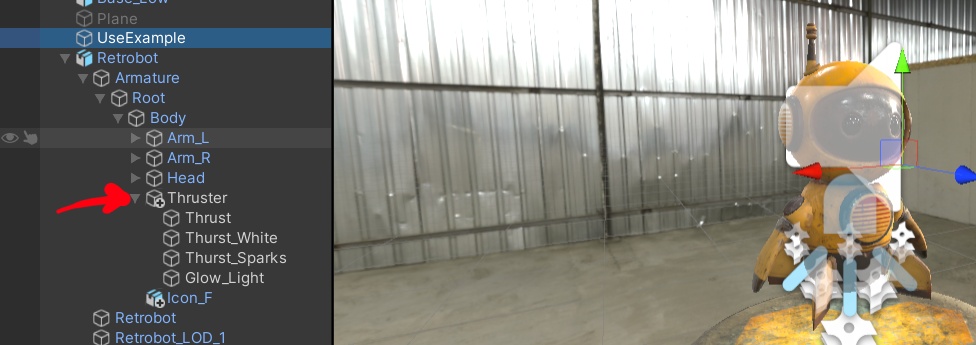
Thruster Control
If you want to create your own thruster effects, you may alter the robot by removing the thrusters in the prefab, or simply disable them and remove the corresponding script from the prefab’s root object. Particle effects can differ between rendering options in Unity, so while the default thrusters work in most cases, they may get in the way in some.
Enable/disable thrusters via script:
// Disable thrusters:
retroBot.GetComponent<RetrobotIconManager>().ActivateThruster(false);

// Enable thrusters:
retroBot.GetComponent<RetrobotIconManager>().ActivateThruster(true);